With the normalization of addresses in Dynamics AX 2012, adding an address onto a form is much more complex than it used to be. Here is a step-by-step to getting it to work:
- You must rename all of the address fields in the current table to begin with “del_” and a configuration key of “SysDeletedObjects60” to begin with. There is a post on this here: http://wp.me/p1F90o-4
- Open the form you want to edit. In this case, it will be our Credit Card form.
- Next, open the ClassDeclaration and insert this variable:
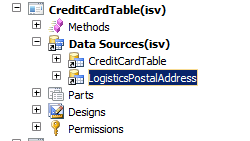
- You will need to add the LogisticsPostalAddress to the form.
Some parameters to keep in mind:
–> AllowCheck, AllowEdit, AllowCreate and AllowDelete need to be set to “No”
–> JoinSource needs to be the main table (in this case “CreditCardTable”)
–> LinkType nees to be “OuterJoin” - The init() method of the form needs to include some specific code:
Note that we are initializing the address controller that we declared. We are passing it our main table and the table we just added. Also note, if you did not map the “Main table” (in this case the CreditCardTable) in the LogisticsLocationMap, you will receive an error when opening the form.
- You need to shut down saving addresses from our form. This is a bit like using the InventDim table on some new forms. Overwrite the “write” and “validateWrite” methods on the “LogisticsPostalAddress” datasource.
and then:
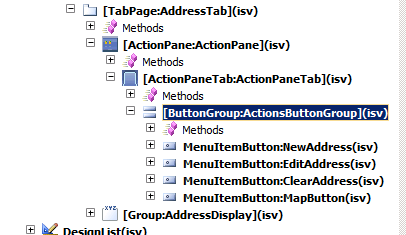
- Now to the less tedious task: getting the form ready. Here is an overview of what you need to put into the form:
+ A new tab for the address.
+ An action pane for the address buttons. We recommend the CustBankAccount form to crib in a pinch.
+ The “AddressDisplay” group, which should come from the LogisticsPostalAddress field group. - At this point, you should be able to open the form and look at your work:
- Try creating and editing your addresses to make sure all is well. Clicking “New” should give you this dialog:
- You may notice that the buttons show “Edit” and “Clear” even when there is no address displayed. You can manage this by updating the “Active” method on the datasource with the following code to make sure the buttons appear correctly:

This change enables/disables the buttons correctly.
- At this point, you should be ready to go.


Discussion
No comments yet.